Tire pressure, Clik valves, and the pump that fits in your jersey pocket
•8 min read
Five years ago, the answer to "what should I bring on a ride?" was simple: a spare tube, two CO2 cartridges, an inflator head, and a chuck-key tucked into a saddle bag. That was the standard for a decade. Almost nobody carries that anymore.
The shift happened in three pieces, none of them dramatic on their own. We got smarter about what tire pressure actually wants to be (it's lower than your hands tell you). The Presta valve — invented in 1893 — finally has a serious challenger. And the CO2 cartridge has been quietly replaced by a 100-gram battery-powered pump that fits in a jersey pocket and refills as many tires as you can throw at it.
Three small revolutions, one ride bag.
Tire pressure: lower than you think
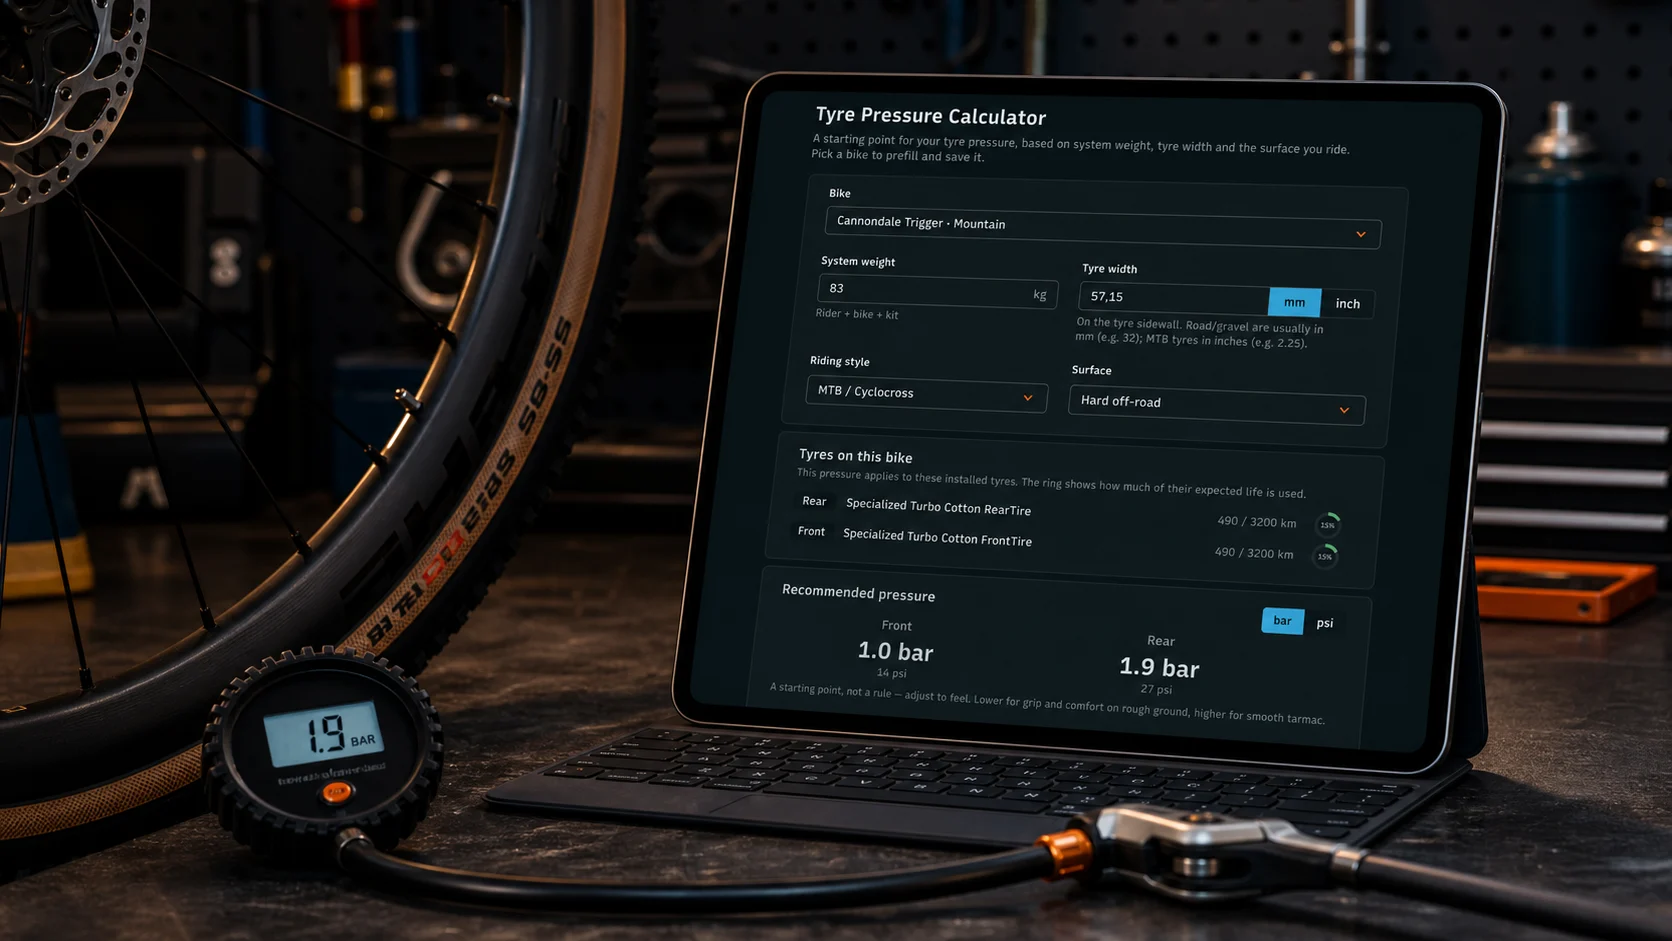
The biggest correction the last decade made to cycling lore is you've been over-inflating. The number stamped on the sidewall is a maximum, not a target. The pressure most riders hit on a track pump — "100 PSI / 6.9 bar feels right for the road, doesn't it?" — is almost always 15–25 PSI (1.0–1.7 bar) above the speed-and-comfort optimum. Throughout the post I'll quote both units; most calculators output PSI, but European track pumps and road-bike circles still talk in bar (1 bar ≈ 14.5 PSI).
Here's the modern picture. Tire pressure has a breakpoint: a number above which rolling resistance starts increasing again because the tire stops absorbing surface roughness and starts vibrating the bike (and you) instead. Real roads aren't a velodrome. The energy you save on a perfectly smooth surface by going firmer disappears in suspension losses on cracked tarmac, expansion joints, and gravel.
What actually drives pressure is four inputs:
| Input | Effect |
|---|---|
| Rider + bike system weight | More weight → more pressure |
| Tire width | Wider → less pressure |
| Rim internal width | Wider rim → less pressure (the tire balloons) |
| Surface roughness | Rougher → less pressure |
Plug those four into any modern calculator and you'll usually get a number 10–20 PSI (0.7–1.4 bar) lower than what you've been running. The big four worth bookmarking:
- SILCA Pro Tire Pressure Calculator — the gold standard. Built on actual roller-test data.
- ENVE Tire Pressure Calculator
- Wolf Tooth — strong on MTB / gravel.
- Rene Herse — biased low, for the supple-tire crowd.
Sample sweet spots (rounded, dry conditions):
| Setup | Rider | PSI | bar |
|---|---|---|---|
| Road, 25c, 19mm internal rim | 70 kg | 75–85 | 5.2–5.9 |
| Road, 28c, 21mm internal rim | 70 kg | 60–70 | 4.1–4.8 |
| Gravel, 40c | 70 kg | 30–38 | 2.1–2.6 |
| Gravel, 45c, tubeless | 70 kg | 25–32 | 1.7–2.2 |
| MTB XC, 2.3" | 80 kg | 22–26 | 1.5–1.8 |
| MTB trail, 2.4" | 80 kg | 20–24 | 1.4–1.7 |
If those numbers look low: that's the point. Try the SILCA suggestion, lower than your usual by 10 PSI (around 0.7 bar), and ride a familiar loop. Most riders find they're faster and the bike feels more planted on bad tarmac. If you're racing on a perfectly smooth velodrome, sure, go up. Otherwise — you're leaving comfort and grip on the table.
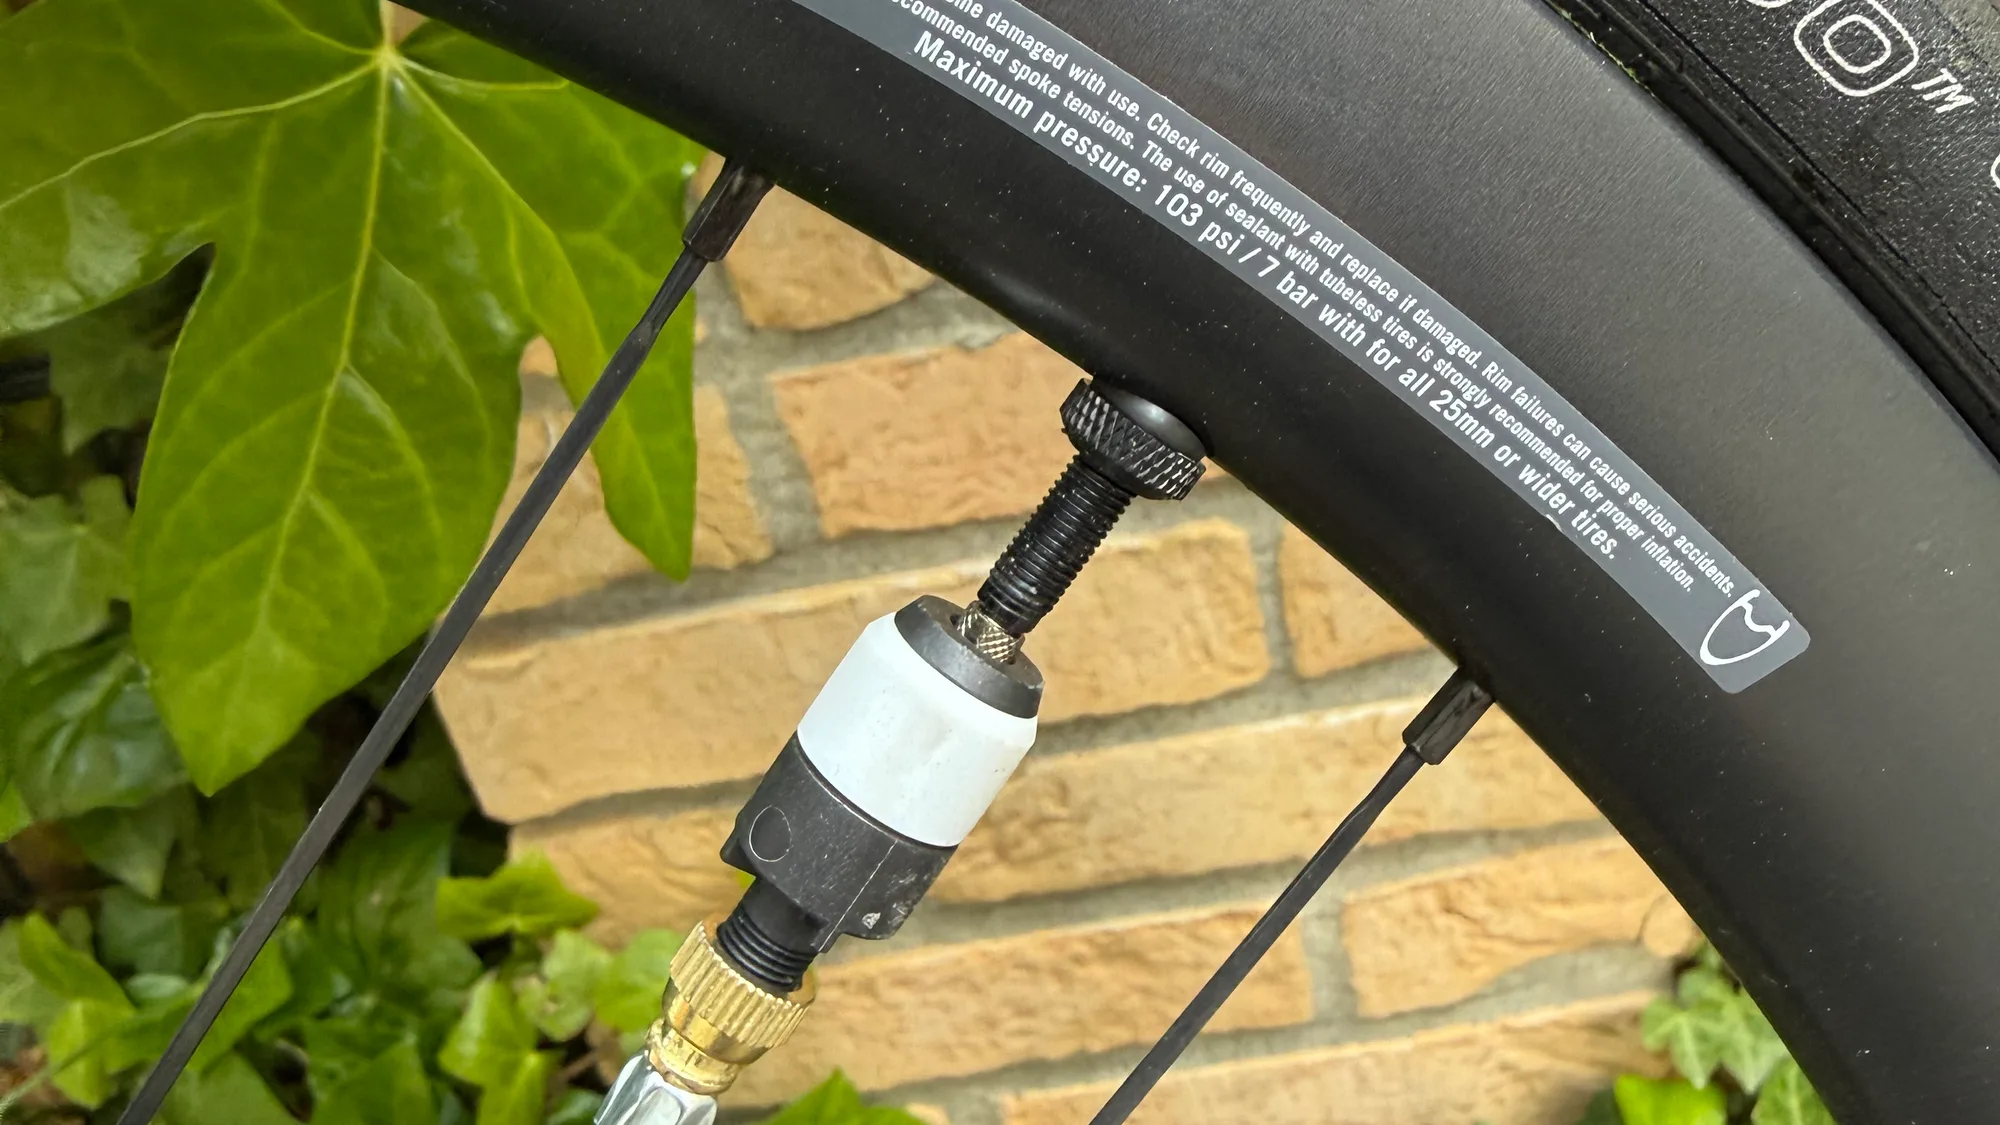
The Presta valve finally has a real competitor: the Schwalbe Clik Valve
The Presta valve has been the road / gravel standard since 1893. It works, but it's fiddly. You unscrew the lockring, you tap the core, you clamp the pump head, you hope nothing leaks while you're working, and you reverse the whole sequence to put it away. Every rider has lost a tire of pressure ripping a pump head off a Presta core they didn't fully close.
Schwalbe's Clik Valve is the first credible replacement in 130 years. Won the Eurobike Award 2024, and the reviews are almost uniformly enthusiastic. Three things make it interesting:
- It clicks. The pump head literally clicks onto the valve and pulls off again. No clamp, no thread to back off. Schwalbe claims 50% better airflow than Presta and almost no air loss when you detach the head. Reviewers consistently note that the click sound is unreasonably satisfying.
- It's a drop-in core swap. The Clik core uses the same thread as a Presta core. Unscrew your existing Presta core, screw in the Clik core, done. You don't need to replace the rim, the wheel, or the tube — just the part you'd already replace if it leaked.
- The pump head can come from anywhere. Schwalbe sells a Clik head that retrofits any Presta pump (track pump, mini pump, electric pump, all of it). Adoption has been faster than anyone expected.
Two honest caveats from the reviews: it's slightly slower than a confident Presta user can be, and the pump head feels a little less "locked on" than a clamped Presta head when you're inflating to 100 PSI / 6.9 bar. Once you adjust, the speed advantage on tubeless reseating is real.
If you're building tubeless wheels in 2026, this is the valve I'd put in. Existing Presta setups: keep them until something needs replacing, then swap the core. Don't buy a complete new wheelset for it.
What you carry has changed
The actual revolution most riders missed: the CO2 cartridge isn't a piece of standard kit anymore. The 100-gram electric mini pump replaced it.
The math:
| Carry option | Weight | Capacity | Reusable |
|---|---|---|---|
| 2× 16 g CO2 + inflator head | ~128 g | 2 inflations | No |
| Cycplus Cube | ~102 g | ~3 road tires per charge | Yes |
| NanoFumpa | ~97 g | ~3 road tires per charge | Yes |
| Cycplus AS2 Pro Max | ~145 g | ~5 road tires per charge | Yes |
| Mini handheld pump | 90–150 g | Unlimited (your arm) | Yes |
The Cycplus AS2 Pro Max inflates a 30c tire to 50 PSI / 3.4 bar in 30 seconds. The Fumpa OG does it in 18 seconds. The Cycplus Cube and NanoFumpa take longer but weigh less than a pair of CO2 cartridges. From Cycling Weekly's 2026 group test, the pattern is consistent: even the smallest of these match a full CO2 kit on weight and beat it on capacity by 3–5×.
What you actually gain by switching:
- You stop carrying single-use brass cylinders. Less waste, less to lose, no expiration anxiety.
- You can fly with it. CO2 cartridges aren't allowed on planes; an electric pump is fine in checked luggage.
- Sealant survives. CO2 (specifically the cold of rapid expansion) gels some tubeless sealants. An electric pump pushes ambient-temperature air; your sealant doesn't care.
- You can top off, not just reflate. A CO2 cartridge is binary — you commit to a full inflation or waste it. An electric pump lets you put 5 PSI (about 0.35 bar) back into a tire that lost a slow leak overnight.
The honest trade-offs: they're loud (~90 dB during inflation — startles you the first time), they get hot during a long inflation, and they take longer than a confident CO2 hit. If you're racing a road event where 18 seconds vs 30 seconds matters more than reusability, CO2 still wins. For everyone else: the electric pump is the new default.
What I'd actually recommend, for the typical road / gravel rider in 2026:
- Day-to-day rides: Cycplus Cube or NanoFumpa in a saddle bag, plus one spare tube and a couple of plugs. Total weight: under 250 g for the inflation kit.
- Long brevets / loaded touring: Mini handheld pump as the failsafe (no battery anxiety) plus an electric for everyday use.
- Racing: still CO2. The 12 seconds matters.
Track it in WatchMy.bike
Tire pressure is one of those wear-adjacent things that doesn't quite fit "service interval" but is worth logging. Two patterns that earn their place in your component log:
- Add the tires as components and track the install date. Tire compounds harden over time even without much wear — a four-year-old set of tires is going to feel different than a fresh one regardless of distance ridden.
- Log a service entry every time you swap valves or rebuild tubeless. "2026-05-19 — fitted Schwalbe Clik cores, 30 ml Stan's sealant per tire, set to 65 PSI / 4.5 bar front, 70 PSI / 4.8 bar rear." When you re-seal in six months and the chat asks "what did you set it to last time?" — there's the answer.
- For new pump or valve gear, store it as a non-bike component if you want a service log. Electric pumps need their batteries cycled occasionally to keep capacity; logging "fully charged 2026-05-12" reminds you to do it before the next big ride.
Or open /chat and just say "add a Cycplus Cube to my gear list, install date today" — same component infrastructure, different category. The assistant handles the bookkeeping.
Running a setup that's far from these numbers and you're convinced it's right? Email me at marien@watchmy.bike — counterexamples are how the next version of this post gets written.